Archive for Uncategorized – Page 4

The Perfect Beginner Jersey Dress – Coco by Tilly & The Buttons

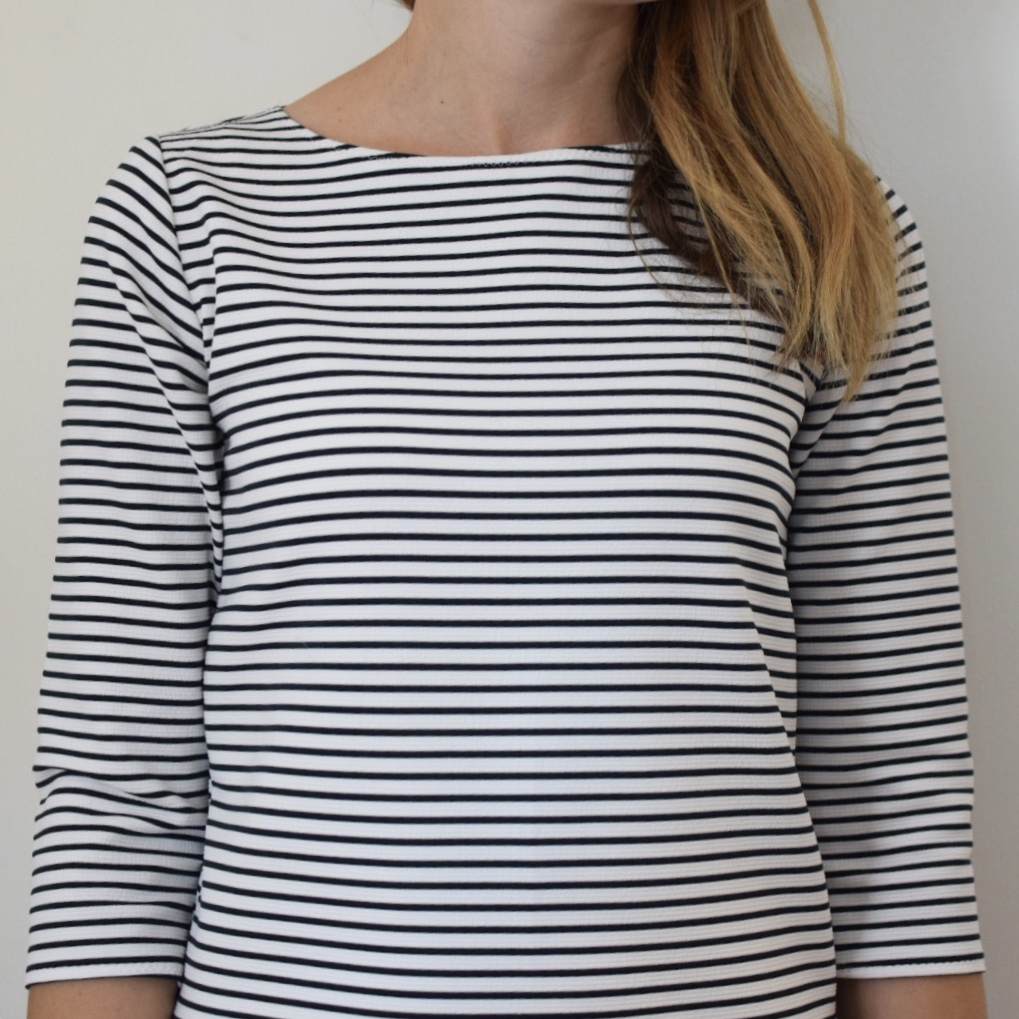
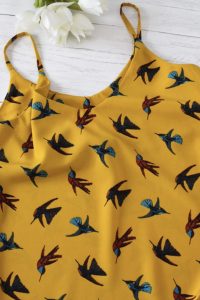
I ordered 2.5 metres of this beautiful textured jersey from 1st for Fabrics because I have a mild obsession with stripes and also because I thought it would be perfect for the Coco pattern.  As always, the fabric arrived beautifully wrapped in pattern paper, with a handwritten note and a spool of cotton, from Julie which added a lovely personal touch.

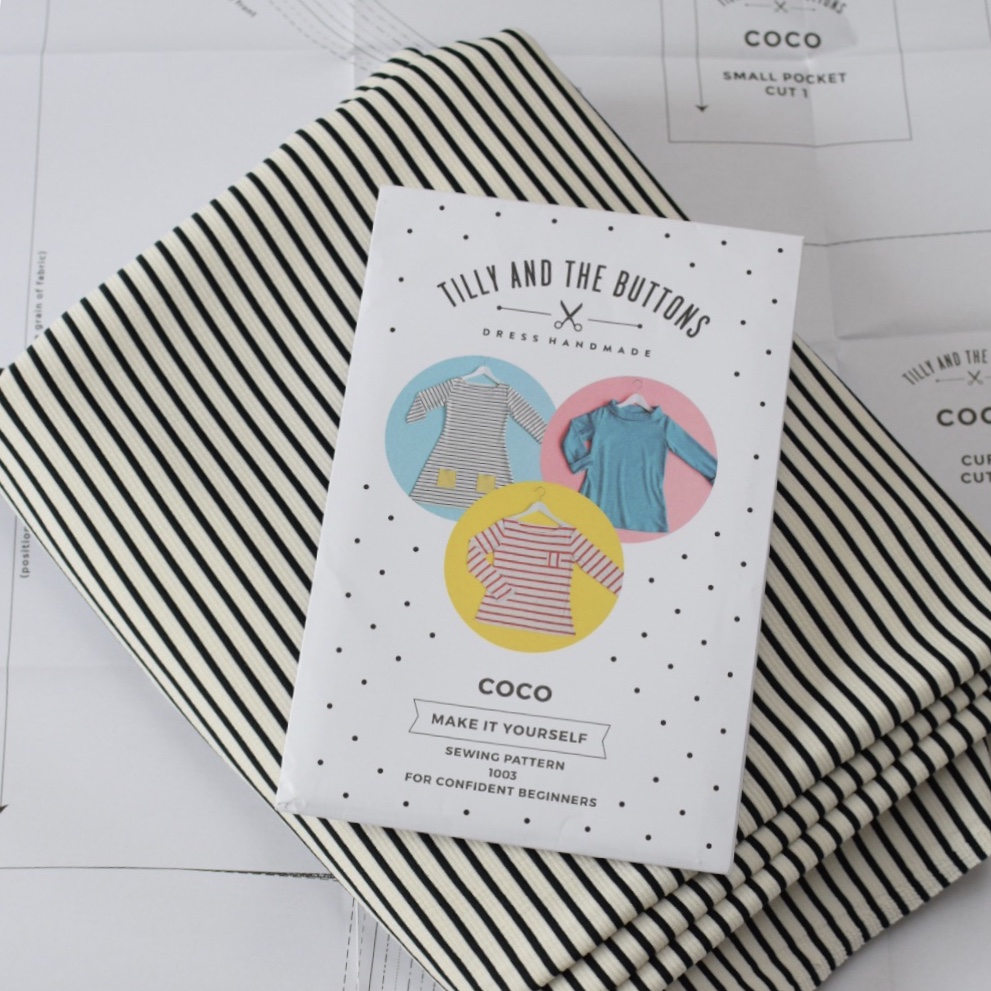
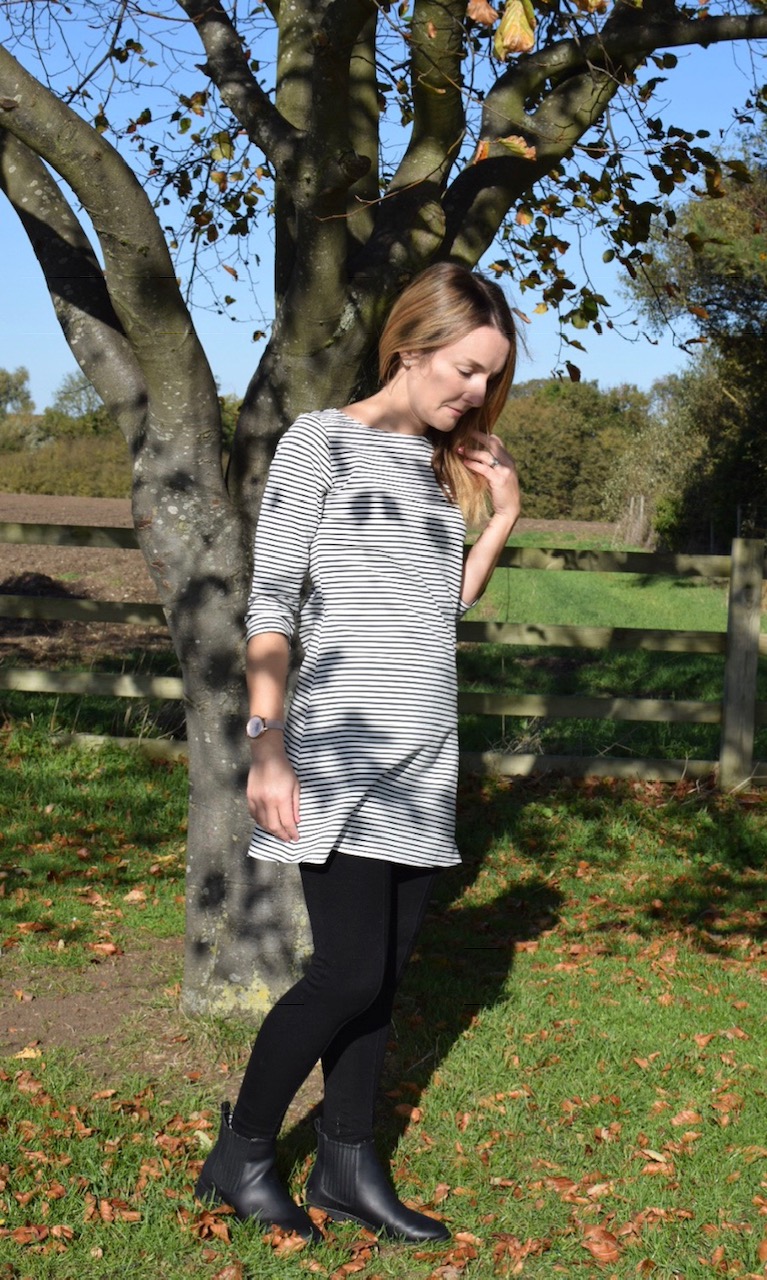
I’d not made the Coco pattern before but I had heard lots of good things about it, I love simple jersey dresses in the autumn and winter for wearing with tights and boots so I knew that this pattern would be a very useful addition to my wardrobe.

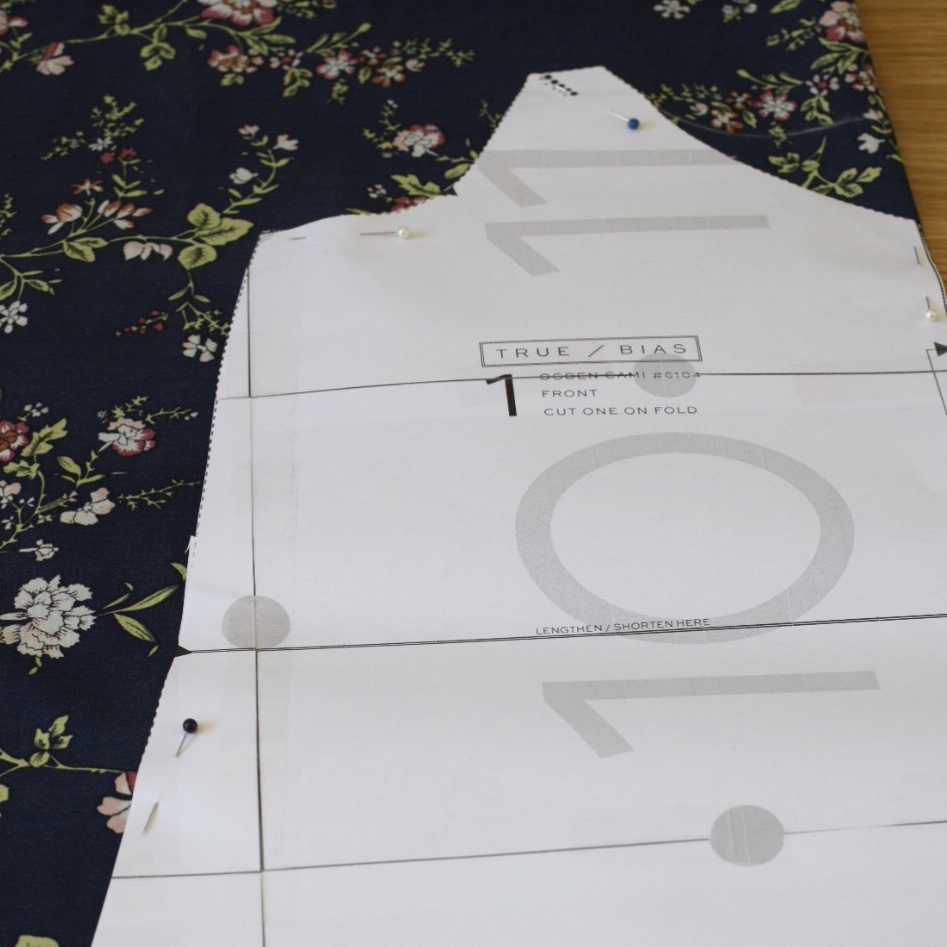
As always, I pre-washed my fabric, it dried quickly and didn’t need any ironing which is always a huge bonus!  I traced off my pattern because I wasn’t too sure on the sizing, I’m quite petite and things often need taking up and in on me unfortunately and didn’t want to cut the wrong size.  I used my cutting board and rotary cutter to cut out my fabric which is a super speedy and easy method for cutting jersey fabric that isn’t too slippery.  This fabric has a little stretch but not too much so it cut out beautifully.

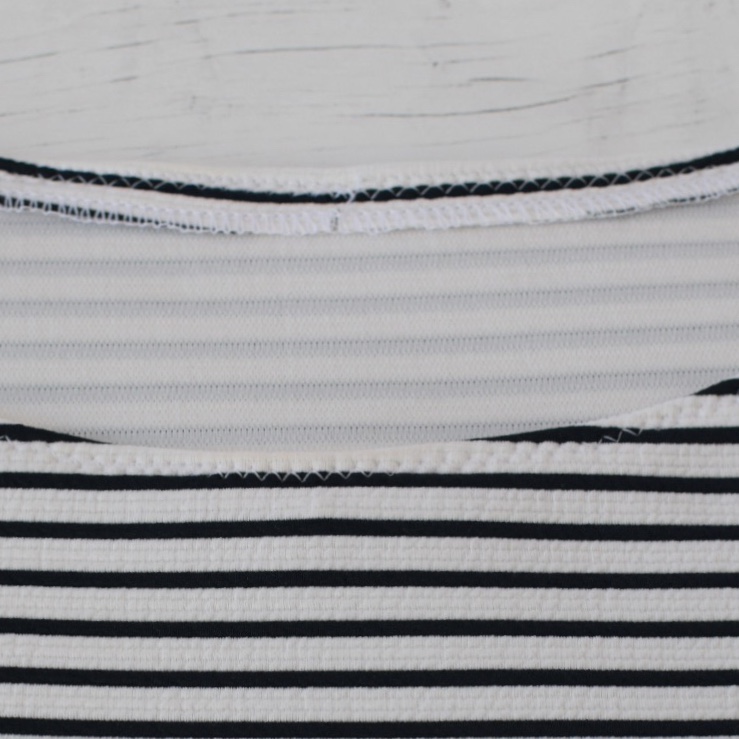
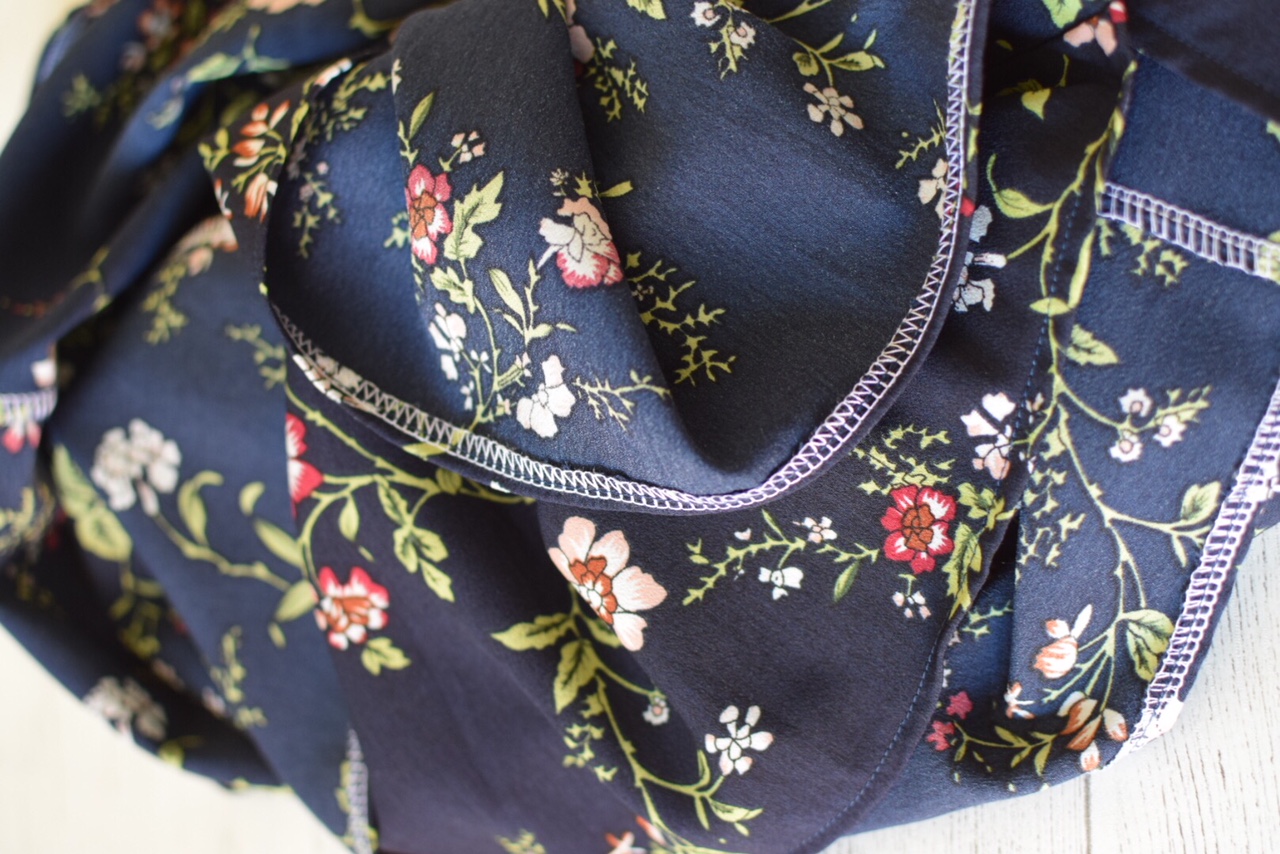
I love the construction of this dress, it’s such a simple but effective style, no darts, no set in sleeves – I’m still quite a beginner when it comes to sewing jersey so it was perfect practice for me. The neckband is also finished simply by turning over a hem rather than fitting a fiddly neckband – super simple and quick.  I overlocked my neck edges before turning and topstitched with a zig zag stitch for a neat finish.

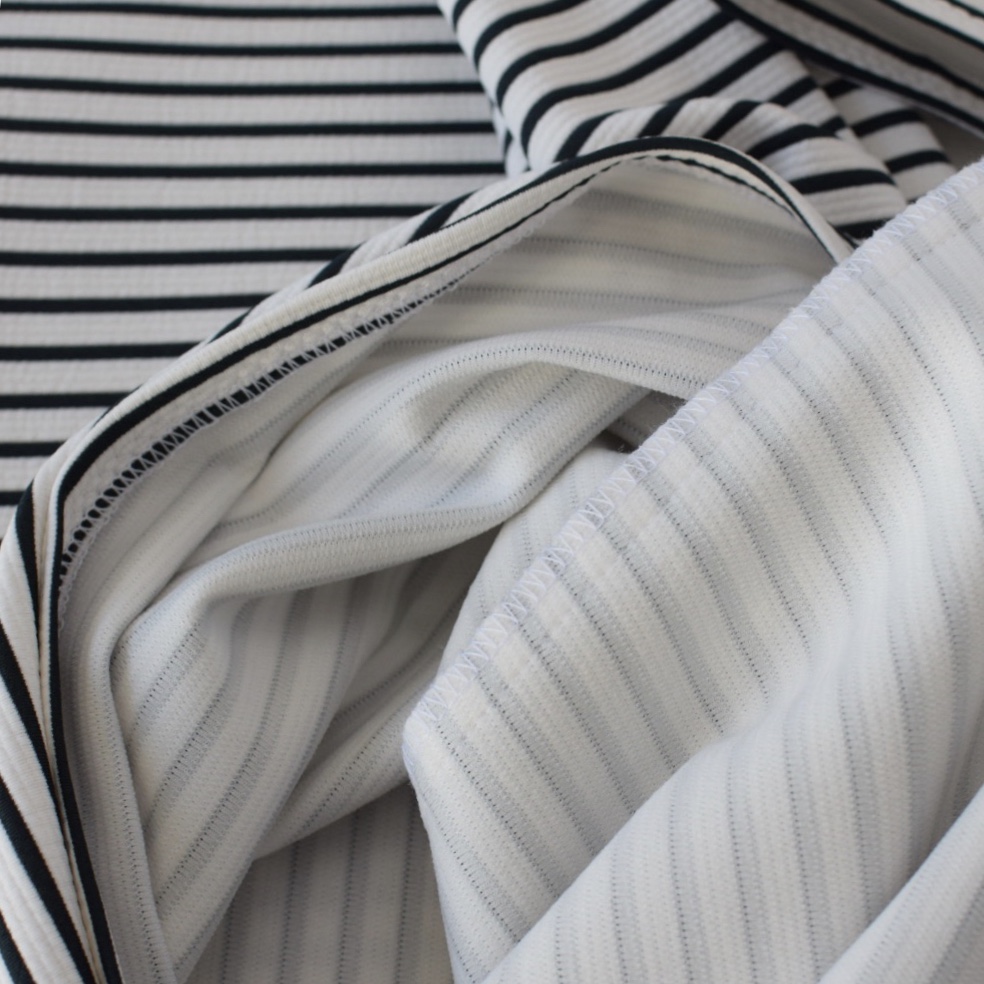
I used my sewing machine to stitch the dress, set on the recommended zig zag stitches and overlocked my seams for a durable finish.  This worked fine but I have heard of people sewing completely with the over locker and I think this is something I might try next time.

Before sewing the hem, I tried on the dress and found it a bit too A line for me, the bodice fitted me perfectly so from the waist I increased the seam allowance to 2.5cm each side and trimmed the excess when finishing with the over locker. I like this slightly narrower style much better on me – it’s still A line but not too much.  I also had to trim off 2 inches from the length of the dress before hemming because I wanted a more ‘tunic style’ length.

Overall, I am so happy with this finished dress.  I made it up in 2.5 hours including tracing the pattern and cutting the fabric.  This jersey fabric from 1st for Fabrics sewed like a dream, no slipping or stretching, it is an absolutely perfect fabric to use for this pattern, especially if you are new to sewing with jersey. 

I love this pattern, the dress will be made again and again although I am going to have a go at the top version next.  Another wardrobe staple.- in fact I’m off to look for some more jersey right now! 

I hope I’ve inspired you to have a go at your own Coco Dress!

Sally x

Instagram: @secret_life_of_a_seamstress

Frequently Asked Questions

I’ve compiled a blog post of frequently asked questions that I’m often asked before customers decide to buy. I hope these will be helpful but as always if you have any other questions don’t hesitate to message me:

QUILTS & BLANKETS

Q: Can the quilts and blankets be machine washed?

A: Yes, my quilts and blankets are machine washable on a cool 30 degree setting. It’s helpful to use a laundry washbag or a pillow case if you have one as this can help to prevent bobbling. The nature of patchwork is that it will pucker slightly over time the more it is washed but this simply adds to the vintage style of the item.

PLEASE NOTE: The patchwork top may be ironed on a cool setting but felt lettering and dimple minky fleece should never be ironed!

Q: Can I have a quilt or blanket personalised?

A: Yes, for both blankets and quilts I have a listing for both personalised and non-personalised items.

Q: Can I choose my own colour scheme for my quilt or blanket?

A: Absolutely! If you are ordering a ‘made to order’ blanket I am very happy to discuss your fabric choice and colour scheme with you before ordering and work with you to get the best fit for your needs. Please note that on some occasions the price may need to be adjusted accordingly depending on the cost of the fabric you require, this will always be made clear before ordering.

Q: Can I have a ‘ready made’ quilt or blanket personalised?

A: I’m afraid not as my names are stitched in before the quilt is finished but always ask and I may be able to replicate or create a similar item and personalise it for you.

NAME & INITIAL CUSHIONS

Q: Can the pillow cases be machine washed?

A: Unfortunately, due to the nature of the applique, my pillow cases are spot clean only.

Q: Can I request a different colour scheme or shape?

A: Of course, I’ll always try to accommodate your request where possible.


PERSONALISED BUNTING

Q: Can I request more end flags?

A: Yes! Just pop me a message to let me know how many extra end flags you would like and I’ll cost them accordingly for you.

Q: Do you make plain fabric bunting?

A: I do, if you would like to order some plain, non-personalised, bunting simply message me and I’ll cost up a custom order for you.

Sew Over It Ultimate Shift Dress Review

Pattern: Sew Over It – Ultimate Shift Dress 

Fabric: Lightweight Rayon Challis – Bold Flowers & Stripes from 1st for Fabric

I ordered 2.5 metres of this beautiful lightweight rayon challis from 1st for Fabrics because I absolutely love both stripes and florals at the moment and this fabric combined the two perfectly.  The fabric arrived beautifully wrapped with a note from Julie which added a lovely personal touch.

At the time of ordering I wasn’t exactly sure what I was going to make from the fabric but I knew I wanted to make a dress from it and that 2.5 metres should easily cover that.

I deliberated for a while over whether to go for the Ultimate Shift Dress or something a bit fuller like the Eden Dress pattern, recently free with Love Sewing magazine, eventually I went with the shift because I thought the simple nature of the pattern would show off the fabric the best.

I have made the Ultimate Shift Dress pattern quite a few times now in long sleeve, short sleeve top and dress form and I absolutely love it, it’s such a simple and quick pattern to make up and looks completely different depending on the type of fabric you use.

As always, I pre-washed my fabric and pressed before sewing.  Cutting out, the rayon was pretty slippery so I used both pattern weights and pins to keep it still and took my time to make sure that the fabric didn’t move around too much while cutting.  When I say pattern weights I mean my phone, stapler and anything else I had to hand!! The fabric did crease a little while working with it but pressed out beautifully.

Button & loop closure

The dress has two bust darts, a centre back seam and a keyhole opening at the back of the neck which you can either close with a hook and eye or a button and loop.  I went for a button and loop closure simply because I hate sewing on hook and eyes!! I also like the finish of the button and loop and the fact that you can add a pretty button as a finishing touch.

When making the sleeveless dress and top the pattern is finished with a neck and armhole facing.  The frill sleeves are lined, overlocked at the top, gathered and simply top stitched into the armhole.  I love the frill sleeves, they are so pretty and add a little extra to an otherwise plain dress. 

Sewing in the neck & armhole facing

Frill sleeves

I had to hack quite a lot off of the length of the dress and also went with a larger hem because I’m quite petite and the dress was very long on me without any alteration.  The perils of being short…!!

Hem length

I’m so pleased with how this dress turned out, I wore it on a recent trip to Hampton Court on one of the hottest days of the year and it was super comfy and cool.  I’m already planning a second version in a simple denim chambray – I just need to find the time and the perfect fabric to make it with!

As with all Sew Over It patterns I’ve made so far the instructions are very clear and easy to follow, I would totally recommend this pattern to someone starting out in dressmaking and for a more experienced sewer you can make this dress up in a couple of hours – perfect!

I hope I’ve inspired you to give this pattern a go if you haven’t already!

Sally xx

True Bias Ogden Cami – A Review….

If you’re a sewer you’ll know that there have been dozens and dozens of these tops all over sewing social media in all the beautiful fabrics so after lusting over about 600 of them on Instagram I decided it was time I gave this pattern a try. 

True Bias Ogden Cami

I downloaded the PDF file direct from the True Bias website for $10.00, it winged it’s way into my Inbox and I printed it straight out.  Given that there are only five pattern pieces in total to print, this pattern was very quick to put together using the cut and stick method and very quick to cut from the fabric too as the pattern shapes are nice and simple.

Yellow Bird Print Polyester

I had in my stash a beautiful yellow bird print polyester fabric which I knew would be perfect for this top so for my first attempt I used that.  I love the finished result of this top, it hangs beautifully on but I do think, on me, both front and back are a little low cut for my modest liking so for my second attempt I rounded out the necklines on both to give a little more coverage (more on that later).

In terms of construction, the top itself comes together so quickly and I actually think turning the spaghetti straps through was the longest part about the construction of my first go, for some reason I just could not get them to turn through with my Prym turning tool thingy. I gave in in the end and used a safety pin which worked much better. 

What I also love about this top is the lining, it’s kind of half lined which I think gives a lovely finish inside.  The pattern calls for you to double hem the lining to finish but I overlocked the edge and turned up a narrow hem instead which I think works just fine.

Overlocked lining

Second time around I used this beautiful navy floral print fabric from John Lewis, I think it’s a polyester and, as I mentioned earlier, I rounded out both front and back pattern pieces by measuring where the neckline of one of my other more modest cami tops sits and, using a dish (no fancy tools here!) to give me the shape I needed I drew the curve onto a piece of pattern paper and added it to the pattern to raise it up to the height I wanted.  As you can see from the pictures below I’ve unfortunately lost the lovely V shaped neckline that I really like about the pattern by doing this but I’m much more happy with the result on my shape and I know I’ll feel more comfortable wearing this altered version.

True Bias Ogden Cami

True Bias Ogden Cami

True Bias Ogden Cami

All in all I absolutely love this pattern, it took me around an hour and a half to make from cut to finish and now I’ve perfected the neckline on me I know I’ll be making a wardrobe full of them for the summer months ahead.

Have you tried this pattern, how did you find it?

Sally x

My dressmaking story…

As well as making beautiful handmade things for my lovely customer’s homes as part of my business, in my spare time I also love to sew clothes for myself and my children.

I have always wanted to make my own clothes. When I was a child of around ten I learned to knit and I would spend lots of my time knitting soft toys and gifts and then eventually, as I got older and more experienced, progressing to jumpers and cardigans which I could wear myself. 

As I got older I became more interested in sewing, my Mum, Nan and Grandma all knew how to sew so I had lots of sources of knowledge and help on my journey.  I remember making a couple of cotton shift tops and a wrap skirt on my Mum’s sewing machine and I was so proud of them. Growing up through my teenage years my interest in craft took a back seat to more ‘exciting’ things but the love of handmade never left me.

I love clothes, I always have, and I’ve always dreamt of having my own handmade wardrobe.  I’m a petite girl and have struggled a lot to get the right fit in clothes on the high street.  Maxi dresses for short girls anyone…..!! 

A few years ago dressmaking and home sewing began to get fashionable again thanks, I believe, to programmes like The Great British Sewing Bee and brands such as Sew Over It and the amazing Lisa Comfort  and I’m so grateful for it.  I’m also grateful for blogs, social media and You Tube, all of which allow me to follow other home sewers, like myself, on their own handmade journeys.  Seeing what other people have made for themselves and learning that not everything that you make will be perfect every time and actually that’s ok, has given me so much inspiration and confidence to keep learning and keep making for myself.

I am absolutely loving my dressmaking hobby and I’m proud of how far I’ve come, making things for my children and seeing them wearing and enjoying them is an amazing feeling and I love the fact that I can make things for myself now, in fabrics that I love, that fit me better than clothes on the high street probably would.  I still have a lot to learn but I’m enjoying the journey.

I have decided to share some of my makes here with you because this blog is about things I love and for me at the moment dressmaking is definitely very high up there.  If you’re not interested in dressmaking I promise I’ll be writing about other things too!

As always, thank you so much for being here!

Sally x